In this post, we will talk about how to bring neat lines in between the columns in reports showing list of records where fields have contents of varying size.
Overview:
While showing list of records in a report using list view, placing the fields at appropriate positions on layout with spaces, gives us the look and feel as that of neatly arrangement in columns. But what if we want to put those data fields in actual columns.
Can we create actual columns using line objects? But there are fields where the data for one record may contain one word and for some other record, it may be of 20 words.
Can we use Filemaker’s default sliding and visibility features, by checking the feature “Also resize the enclosing part” for the field along with the line objects? But that feature doesn’t work as long as any object for column creation is present. Illustrating the above problem using an example, we finally, reveal a simple solution.
Approaches to put the column and showing records on a list view report:
Approach 1:
- When we use Filemaker’s default sliding and visibility features, by checking the feature “Also resize the enclosing part” for the field on layout setup, they look like below.
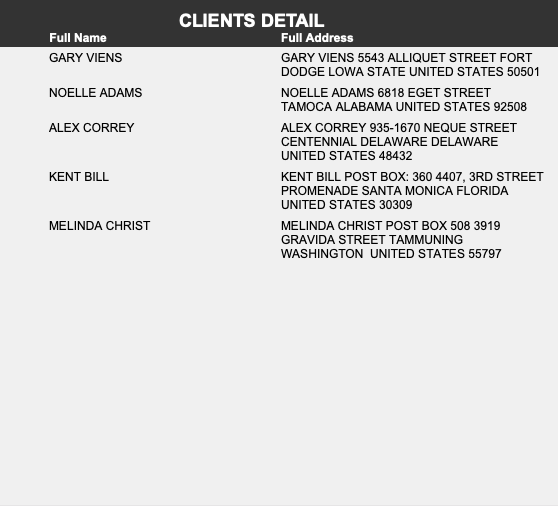
- You can see that different records have text data of different lengths and accordingly, the space occupied by the field for that record is proportional to the size of the field data. It is made possible by using Filemaker’s default sliding and visibility features, by checking the feature “Also resize the enclosing part” for the field on the layout setup.
Approach 2:
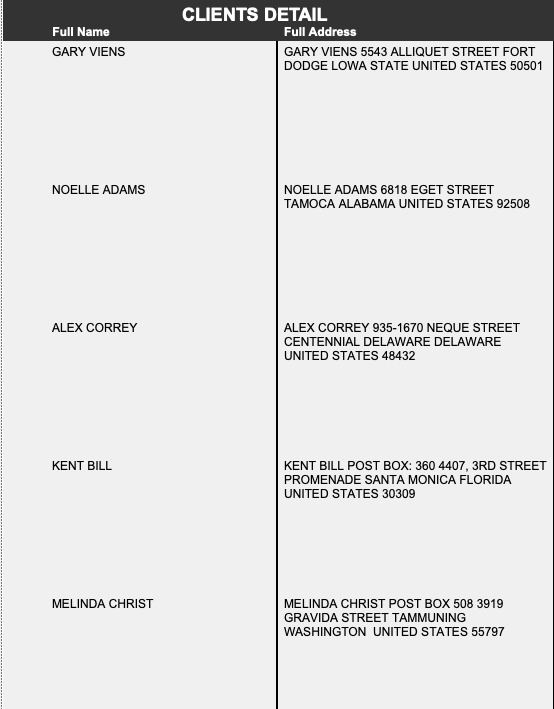
- As shown below, putting line objects between the fields doesn’t provide us a solution, because sliding features of the field, doesn’t work with the line object put between them.
Approach 3:
- Here, comes the hack, the fruit of the article, showing us the solution.
- By using the field, which we know, may contain the largest data, of the available fields, on the layout, and keeping under each field (using Arrange → Send to Back feature) in all columns – and by making it’s text color, such that the text cancels, itself against the body color, ( should become invisible on viewing in report ), we can solve this problem.
- For these field objects, we mark the border on the appropriate side such that it shows as columns as shown below. We also position them without any spaces between these objects, so as to form column lines vertically and have their height covering the entire body so that single horizontal line appears.
We will explain how to do that with an example.
The steps are:
1) Identify the field which is going to contain larger amount of data – requires more space on layout.
In our example, As you can see, the Full Address field is the one containing the largest text in each record. Also note that full address of different records are of different lengths.
2) Keep the field below to all the other field objects as shown below using Arrange –> Send to back feature.
3) Make all the field objects containing the largest amount of data, with their Sliding features and visibility checked in as Sliding up based on, all objects above and mark the check box, Also resize the enclosing part.
4) Make the text color, body color such that the text inside the field objects, which were placed under all other field objects of the record, are invisible by using Graphic feature and Text feature.
5) Mark the border of the field objects on the appropriate side.
In our case, Full Address field object on the second column is marked its border on lower and right side.
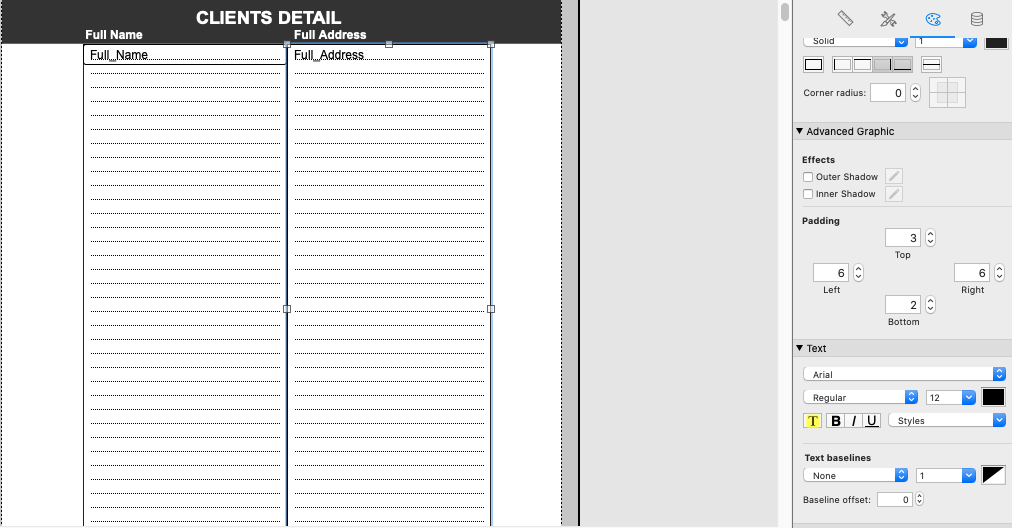 Another ( full address) field object is marked on its left, right and bottom by using Appearance –> Graphic feature.
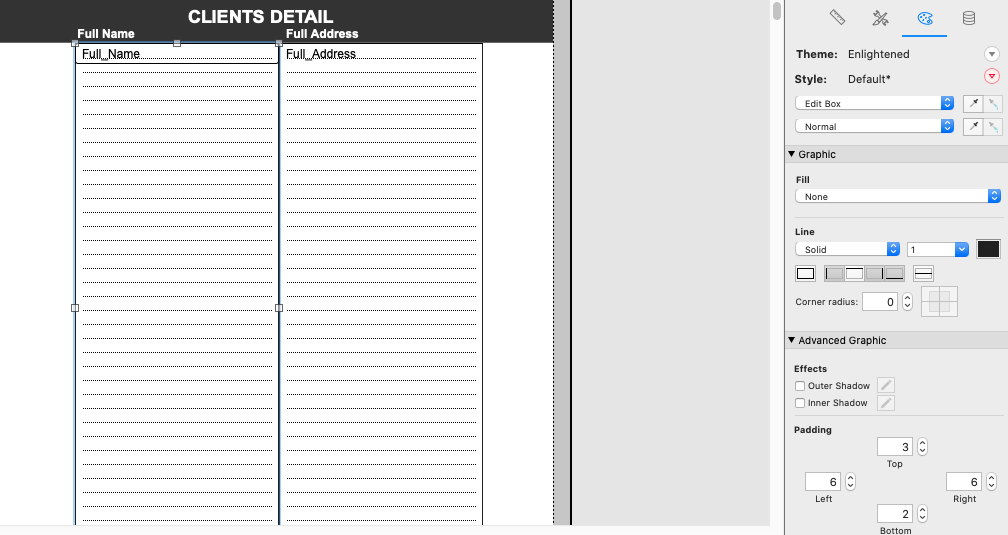
Note that we haven’t marked all the four sides of an object, otherwise, will appear thicker for the common – touching sides and robs the good look.
5) Position all the field objects without any space between them so that border marked will form as column lines between the different fields of a record. Also, the height of the field objects must occupy the entire body part.
Finally we can see them as though the field data are put in a neat column.
 The team at FMDBSolutions hopes this article taught you how to put lines between the fields such that the records look like neatly arranged in columns. FMDBSolutions is a team of well-qualified experts that have a lot of experience with the many versions of FileMaker Pro and the FileMaker Go app too.
Our team knows all about transitioning, migrating, converting, and upgrading for FileMaker. Companies that require FileMaker Integration can also use our services. We have worked with clients from the USA, Australia, and Singapore and will complete your FileMaker assignment in the best possible way at a lower price but the same or higher level of excellence.
If you want solutions to your FileMaker database, we can help. Click the below box for a free FileMaker consultation.

You can also leave us your email below for receiving new updates regarding FileMaker and our company.